In part two of our introduction to uBlock Origin on macOS, the best ad blocker in the business, we’ll be discussing static filtering rules and GUI methods of selecting and blocking on-screen content.
Removing Elements with Static Rules
If you want to remove elements from the page using graphical tools, you can access that feature by setting cosmetic rules. These rules remove DOM elements based on a graphically-based node selection by the user. If you see something on a website that bothers you, like a email subscription banner, an ad-block detector, or anything else offensive to your sensibilities, you can remove it this way.
Temporary Rules: Element Zapper
There are two different ways to set cosmetic rules in uBlock Origin. The first is with the Element Zapper, accessed through the lightning bolt icon on uBlock Origin’s extension dropdown pane.
This tool sets a temporary rule removing the specified DOM element. With the next browser session, the element will return. To create a rule, click the element zapper icon, and then click on the page element you want to remove. As you mouse over various DOM elements, they’ll be colored yellow to indicate what element is currently selected. Once the right element is selected, click to remove the selected element instantly. No confirmation box will appear after clicking

The element zapper will do its best to pick the element you’ve selected, but you might need to dance your mouse around a bit to get the element you’re hoping for. It will attempt to adhere to the largest DOM object that its algorithm can locate and select.
Permanent Rules: Element Picker
To set a permanent rule, use the Element Picker, represented by the eyedropper icon to the right of the lightning bolt.

This will activate an interface similar to the element zapper, but now DOM elements will be highlighted in red instead of yellow.
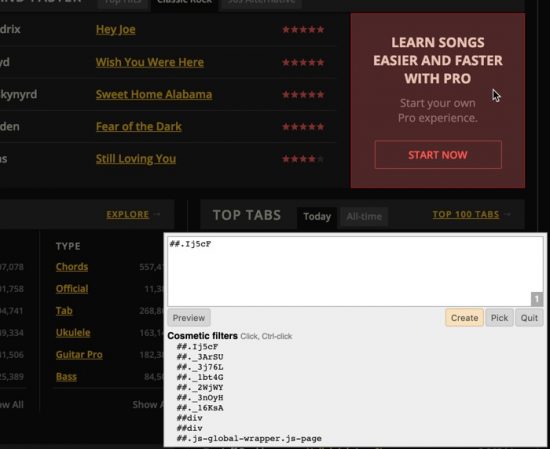
When you click on the red highlighted element, a text box will appear in the lower-right, previewing the class or ID of the selected element. It’s this text-based class or ID match that will be used to remove the element in the future. And since many sites obfuscate their code to make ad blocking more difficult, you may need to refine the element picker’s automatic selection from time to time. You can also use this tool to select “layers” of the DOM that are completely obscured or exist only in DOM logic.
To select a different element, mouse over its name in the yellow box below the white text box. Click on the text to see the associated element highlighted in red.
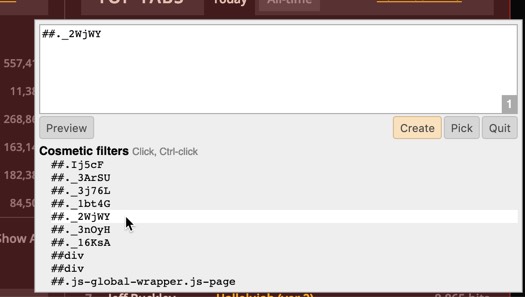
When the correct element is selected, click the “Create” button to create the rule and remove the element. You can also click the adjacent “Pick” button to return to the element picker if you selected the wrong part of the page.

In the future you can find the rule in uBlock Origin’s settings under the “My Filters” tab. New rules will appear at the bottom of the list with their data and timestamp.

If you want to ignore a rule, you can type an exclamation point at the beginning of the line to comment out the element rule. You can also see additional static filer syntax in uBlock Origin’s documentation on GitHub.
Finding and Using Custom Filter Lists
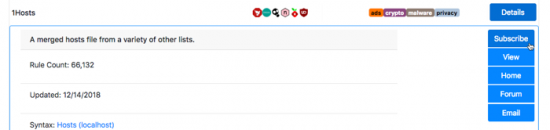
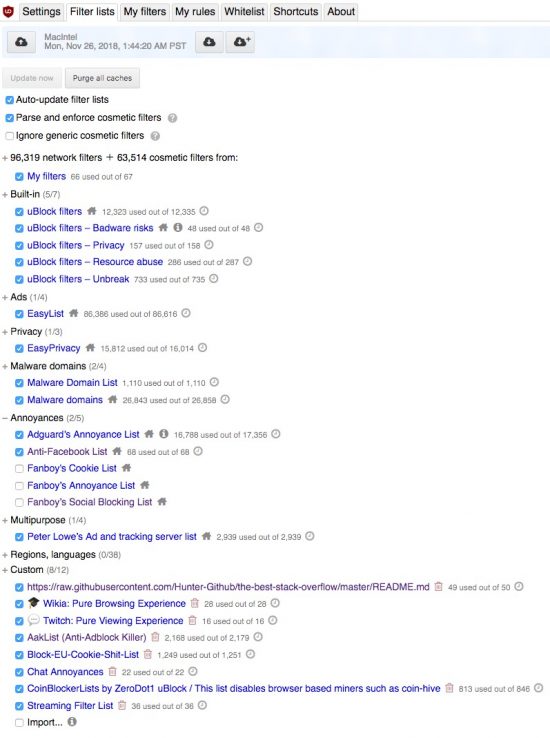
uBlock Origin comes with some preset filter lists, but there are many more you can add. The easiest way to add more filters is to browse FilterLists.
If you find a filter list you want to add to uBlock Origin’s filters, click “Details” and then “Subscribe.” This will automatically download and include the list in uBlock Origin’s blocking rules for websites visited in the future. Only lists with the uBlock Origin icon can be added to uBlock Origin in this way.
These filters will then appear under the “Filter Lists” tab in uBlock Origin’s options page. They can be viewed and toggled from that page in the future.
Storing and Syncing Rules
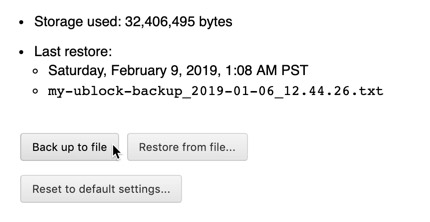
To make a local backup of your uBlock Origin rules, you can save your settings out to a file. Find the dialog options at the bottom of the main uBlock Origin settings tab.
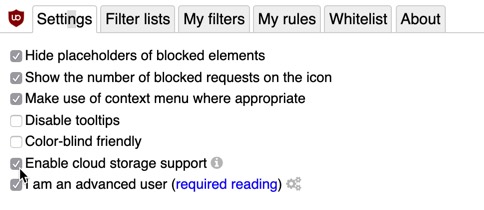
If you want to use the browser-based cloud storage for extensions, you can tick the “Enable cloud storage” option on the main page of uBlock Origin’s settings. This will allow you to upload data within the extension’s small file space within the browser. This only syncs with other copies of the same browser, however.
If you upload your uBlock Origin settings in Firefox, you cannot then download them in Chrome on another computer. As a result, sharing configurations through files is the most reliable method of the time being. To sync your rules among multiple browsers and computers, you can share the backup configuration text file over a cloud storage service.
Conclusion
uBlock Origin isn’t exactly an ad blocker. It’s a wide-spectrum content blocker. That means it can control what comes into your browser no matter its origin. That makes it extremely powerful, and extremely easy to mess up. So take care with what you do, and if something breaks, be prepared to fix it.
You might also like the following posts: