
Apple’s Image Capture app is one of the little-known pieces of exceptionally useful software that ships with every Mac. As the name implies, it’s used to import images and capture input from scanners. It can be used with any scanner, smartphone, digital camera, or memory card, and it’s often easier to use than manufacturer-provided software.
Scan Documents from Image Capture
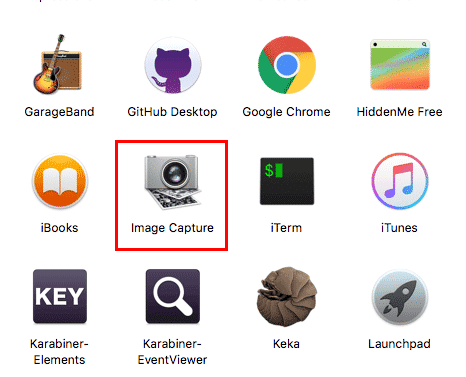
1. Open Image Capture from the Applications folder.
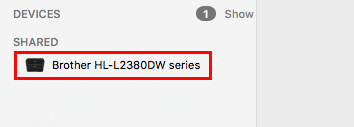
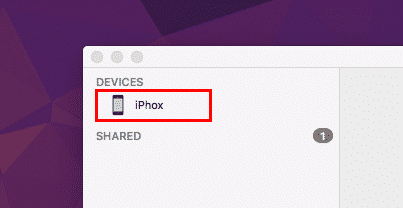
2. Select your scanner from the left-hand pane of Image Capture, labeled Devices. You may need to hover over Shared and click the Show button to reveal your printer.
3. After you select your scanner, Image Capture will prepare an overview scan. This scan shows what’s currently on the scanner, providing a preview of your to-be-scanned document. The document hasn’t been scanned yet, and no scanned file exists yet. This preview is only to show the effects of the options we’ll adjust going forwards.
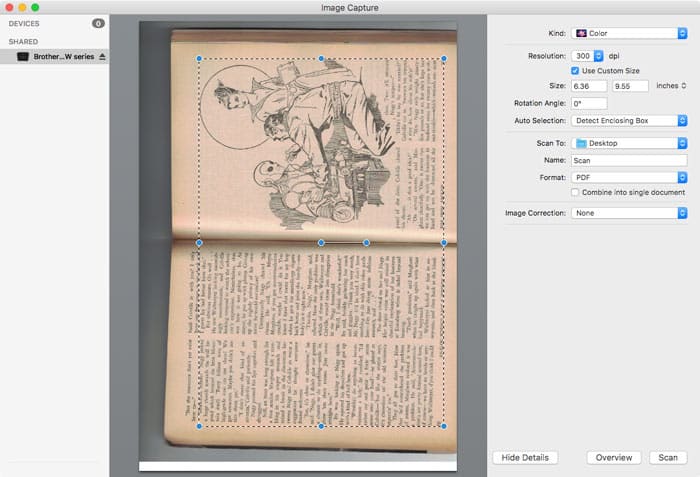
A selection box with blue adjustment handles will automatically be placed around the scanned item. Image Capture automatically generates this box based on its interpretation of what’s on the scanning glass. Depending on your settings, it will try to detect the “edge” of a document. It’s great with simple objects like letter-sized paper or ID cards, but not as accurate when it comes to irregular shapes, like this book.
4. Now we scan select some options for our scan. There’s a few options here for us to break down:
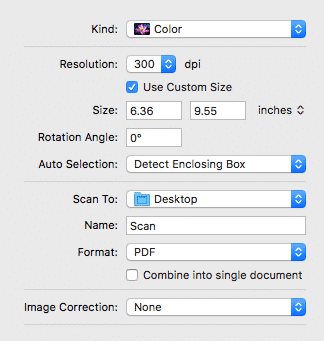
Kind: Choose the color mode of your scan. You can select Color, Black & White, or Text. Text is an ultra-high contrast mode that’s helpful for text-only documents, but its often too aggressive for documents with logos or imagery.
Resolution: Set the resolution of the scan in dpi, or dots per inch. Higher is better, but only up to a point. There’s no need to go above 300 dpi unless you know you need to. Even 150 dpi is sufficient for most applications, especially text-based documents.
Sizing: Set the size of the input box for our scan. Everything inside the blue-handled input box will be part of the scanned file; everything outside it will be excluded. Uncheck “Use Custom Size” to reveal a dropdown box of standard sizes, including A4, Letter and Legal sizes. You can also adjust the size of your scan by dragging the blue handles in the preview window.
Rotation Angle: Rotate the input box by a specific number of degrees. You can also adjust the angle of the scan using the central rotation handle in the preview window. If you need to make a small adjustment (less than 5°), the input box will be more precise. Pro tip: if you accidentially put your document in upside down, change the rotation angle to 180° to flip it over digitally.
Auto Selection: Adjust how Image Capture’s document detection works. The program can be set to detect the edges of multiple items simultaneously, detect the edges of a single document, or do nothing at all.
Scan To: Select where the scanned file should be saved.
Name: Input the scanned document’s file name. If this file name already exists in your save location, a number will be appended to the file name.
Format: Select the file format for your scan. Options include PDF, JPG, and PNG. If you want to scan a multi-page PDF, tick the box next to Combine into single document.
Image Correction: On some scanners, you can use this dropdown box to reveal advanced image adjustment options.

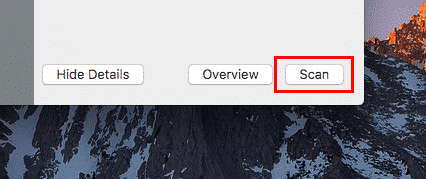
6. Once you’ve made all your selections and chosen a save location, click the Scan button in the lower right to scan the document.
Import Images from Cameras
Image Capture can also import images from an attached smartphone, digital camera or memory card.
1. Connect your smartphone, digital camera or memory card to your Mac using the appropriate cable.
2. Select your device from the Devices pane on the left-hand side.
3. Now you’ll see a preview of all the images stored on your device. To select images for importing, click on the images.
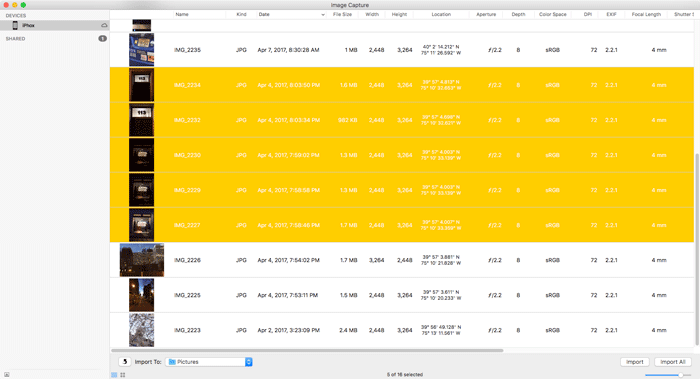
You can select multiple images by holding down the Command key. You can also select a range of images by holding down the Shift key. If you’re importing from an iPhone, keep in mind that only images actually stored on your device will be available for import. If you have “Optimize iPhone Storage” turned on for your iPhone, images that have been stored in iCloud will not be shown for import, even though they are visible in the Photos app.
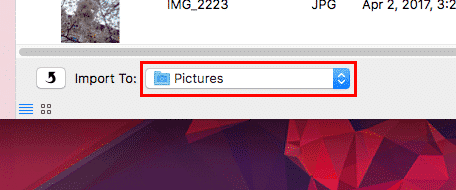
4. Once you’ve selected all the images you want to import from your device, choose a save location at the bottom of the screen.
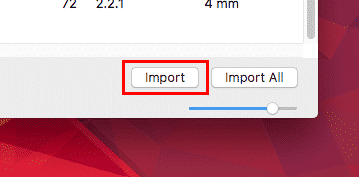
5. Click the Import button to import the selected images. You can also click Import All to import every image on the device regardless of your current selection.
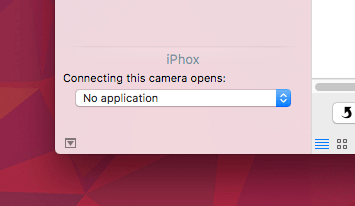
Adjust Default Application for Devices
Image Capture also controls which application open automatically when a smartphone, digital camera or memory card is connected. to your Mac.
1. Connect the device you want to change (or remove) the auto-launching application for.
2. Click the disclosure triangle in the lower left of Image Capture’s window.

3. Choose an application from the dropdown menu. You can also select No application to disable auto-launching an application when the device is connected.
You might also like:


One thought on “Scan and Import Images Efficiently with Image Capture”
Image Capture thinks all my images are upside down even though they are correctly positioned on my scanner bed. And why does Apple use the word Overview when everyone else uses Preview?