

Authenticate sudo Commands with Touch ID
If you have a newer MacBook Pro, you may have gotten used to authenticating with Touch ID. But by default, Touch ID is not set up to authenticate sudo commands. These commands, which allow for a broader range of power in the command line, have to be authenticated by a password. If you’re a developer or power user on macOS, you might use sudo frequently. It can be extremely useful to authenticate sudo commands with Touch ID.
With a little bit of text file editing, we can access and edit the list of acceptable authentication methods for sudo. By adding a line of text, we’ll make Touch ID an acceptable method of authenticating sudo commands.
1. Open Terminal (found in “/Applications/Utilities”) and run the following command:
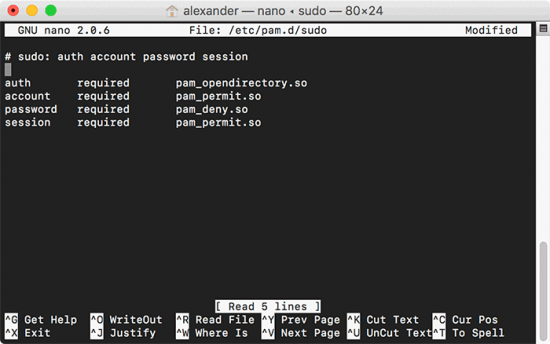
sudo nano /etc/pam.d/sudo

This will open the list of valid methods for authenticating at the sudo prompt. This is where we will add Touch ID as a valid method of authentication.
2. Create a new line underneath the line beginning with “#sudo” by pressing the down arrow key, then the Return key.
3. On the new line you just created, paste the following text:
auth sufficient pam_tid.so
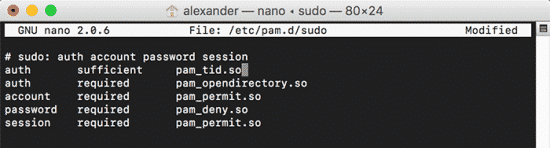
You may notice that this text contains some spacing so it lines up cleanly with the existing entries. This isn’t strictly necessary, but it makes things easy to keep track of.
When you add this text, you’ll be adding a new way to authenticate sudo. This adds the Touch ID PAM (pluggable authentication method) to the list of methods that can “unlock” sudo. The other options on the list include account authentication, password authentication, and session authentication.
4. Press Ctrl + O and Enter to save the updated document.
5. Press Ctrl + X to quit the nano text editor.
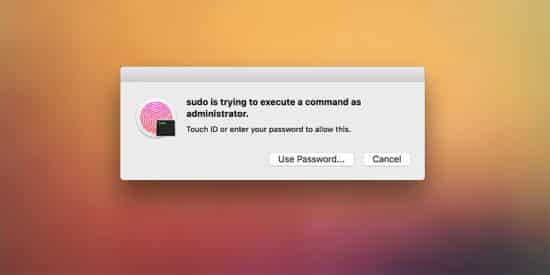
6. The next time you need sudo, you’ll see the standard system dialog box prompting for the input. If it authenticates directly, you’ll have access to sudo.

If you’d prefer to authenticate via your password instead, click the “Use Password …” button and enter your password in the dialog box.
Change the sudo Timeout
Once you’ve entered your password for sudo, you won’t have to re-enter it again for the remainder of the Terminal session. If you find this insecure and prefer to enter your password every time sudo is invoked, you can adjust the sudo password timeout to be more secure.
1. In Terminal, run the following command:
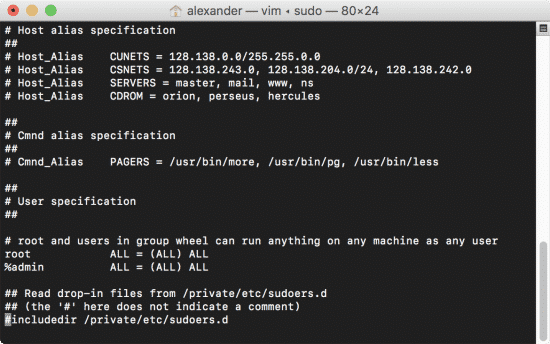
sudo visudo

This command will open visudo, which allows you to edit the sudoers file.
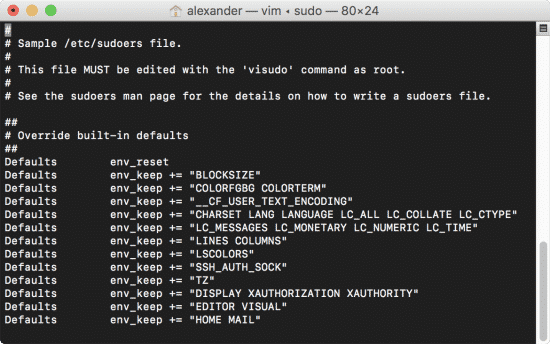
This is another text file which contains many of the preferences for sudo are stored and edited.
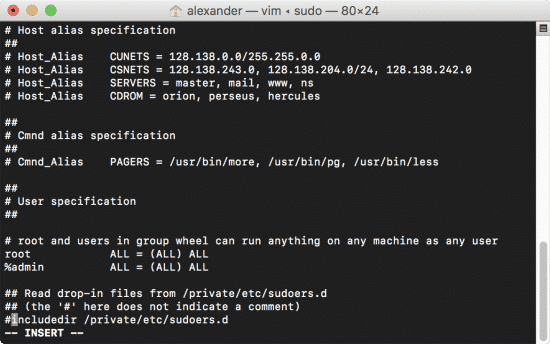
Note: you might have realized that you’re in vim at this point. If you don’t know how to use vim, it can be a little confusing. Follow the instructions below exactly.
2. Press “Shift-G” to navigate to the end of the document.
3. Press the “A” key to enter append text mode in vim. You’ll see the text “– INSERT –” appear at the bottom of the window.
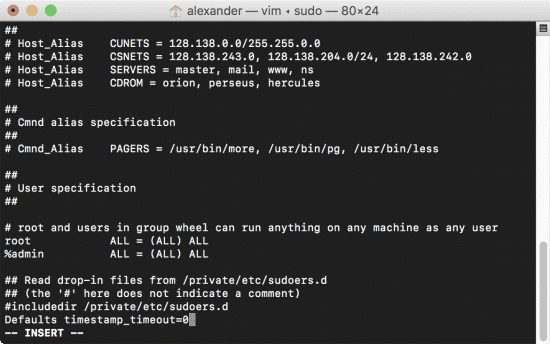
4. Create a newline at the bottom of the document by using the arrow keys to navigate to the end of the last line and pressing the “Enter” key.
5. Type in the following line. Normal copy and past commands don’t work in vim, so you’ll need to type it exactly as it appears:
Defaults timestamp_timeout=0
This will set your sudo timeout to zero seconds, meaning that you’ll have a zero second grace period between when you execute a sudo command and when you must re-enter your password.
You can also set the timeout to -1, which gives you an infinite grace period.You should never do this: it means you’ll never have a prompt to confirm sudo. Use sudo incorrectly once, and you have a very real possibility of nuking your system.
You can also extend the timeout period to a longer interval (perhaps five seconds) if you’d like some grace period, but not as much as the default.
6. Press “Escape,” then type :wq and press Enter.
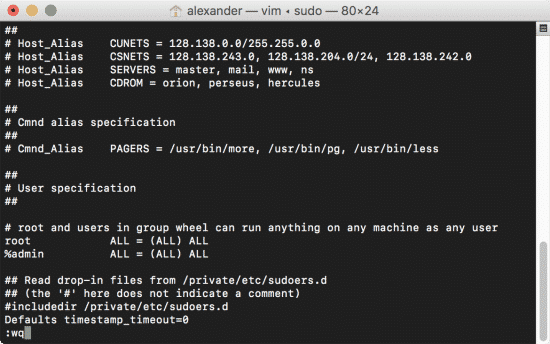
This will close and save the document, returning you to the command prompt. Refresh the Terminal, and you’ll find that your new sudo preferences are operational.
Conclusion
Tweaking sudo can be a helpful way to make your Terminal run more like you’d prefer. If you have a complex password, replacing the prompt with Touch ID can save you time and annoyance. You’ll still have the option to enter your password manually with the “Use Password…” button. Changing your sudo timeout can make your system more secure, especially if you regularly run potentially dangerous system modifications through Terminal.
Featured image by Jamie Cox from Melbourne, USA (Zenith Z-19 TerminalUploaded by Mewtu) [CC BY 2.0], via Wikimedia Commons
You might also like the following posts:


2 thoughts on “Pro Terminal Commands: Changing How Sudo Works”
You appear to be very smart in this area of terminal. Are you available to help with opening the /dev/fd folder as we need to get in there. Do you know how to do this?
Lamb Agency
You should be able to navigate directly into the folder with “cd /dev/fd” and that worked in my tests. What are you trying to accomplish in the folder? That might help us get to your goal more effectively.